Friday, December 17, 2010

Too Cute Tassies for Two Cute Twins

Little Pecan Tassies

For Stacy and Steph's birthday I made them Pecan Tassies. They are basically pecan pie made miniature in mini muffin tins. I made a pecan pie for Thanksgiving a few weeks later and I actually prefer these mini versions more. It might be the recipe or it might just be because tassies are just so darn cute!

The recipe comes from one of my favorite baking websites Joy of Baking. I followed the recipe exactly and they came out pretty well. I don't think mine are quite as pretty or uniform as the original recipe but tasty nonetheless. It was a little difficult to push the dough into the mini muffin tins and I realized later that it is important to make sure to push the dough all the way down to avoid air pockets in the finished tassies.

Pecan Tassies are a great alternative to baking a whole pie as they are quick and easy to make and taste just as good (if not better) than a pie. 

Tuesday, December 14, 2010

Fallin' for Fried Apple Pies

Fried Apple Pies Covered in Powdered Sugar

This is a really late post, but for Halloween I decided to make Fried Apple Pies. Apples are definitely a Fall fruit so I thought it would be perfect for a Halloween celebration. While they are somewhat 'reminiscent of McDonaldss apple pies I can't tell for sure as I can't remember ever eating a fried apple pie from McDonalds! 

The recipe came from here and I made just a couple changes. I used about a teaspoon of vanilla extract instead of the vanilla bean. Also, with 5 apples I ended up with a lot of extra filling. I thought my apples were just regular sized but I guess they were on the larger side. I would maybe cut this down to 4 apples (it would be better to come up with an amount in cups...). Besides that, after a couple of pies were fried they were opening up at the seams. Ryan suggested we poke holes in the tops and this definitely helped stop them from expanding too much and opening.

They were pretty tasty even though they were not fresh out of the oil when we ate them. I'm sure they would have been even better piping hot!

Thursday, November 18, 2010

Birthday Key Lime Bars

Pretty, Pretty Birthday Lime Bars!

For Madi's birthday I decided to make Martha Stewart's Key Lime Bars. They have a graham cracker crust which I think really complimented the creamy key lime filling. I think I like the graham cracker crust more than a shortbread crust usually found on lemon bars so I might try using this with a lemon bar filling on top. 

This recipe was quite simple, but for me one measurement was really off. The recipe calls for 2/3 cup of key lime juice and says it will take over 20 key limes, but it only took be about 10. I'm not sure if my limes were just extra big or extra juicy, but I would buy extra limes just in case. Also, I'm not sure how necessary the extra 2 1/2 tablespoons of graham cracker crumbs are, but I put it in. I only garnished a couple of the bars with limes because they were being transported but I wouldn't eat the lime garnish anyway so it isn't necessary.

Here is the recipe!

Thursday, October 14, 2010

Birthday Macarons

Pink Macarons with Chocolate Ganache

I made more macarons for Melissa's birthday last week. This time I made plain cookies, colored pink, and again filled them with chocolate ganache. They are pink because I was originally going to fill them with strawberry buttercream but it didn't turn out =( Luckily, I think the macarons taste pretty good with chocolate filling. At Berkeley Bowl I found almond meal - already ground almonds, which was lot finer than my mini food processor can get the almonds, resulting in a better texture. I used a different recipe this time and I think I like the results better. Also, I used silpats this time (it helped a lot!) plus I baked them slightly longer, which I think helped the cookies come off the baking sheets more easily.

I found some boxes at a baking supply store and bought a few different ones to see which would work. I think they look really cute in the box, although this isn't a very good picture of them. I added a bow before I gave them to Mel.

Here is the recipe:

Ingredients:
225g powdered sugar
125g almond meal/flour
25g sugar
100g egg whites (about 4), aged
red food coloring (7-8 drops)
chocolate ganache to fill cookies
Directions:
  1. DO AHEAD: Separate eggs and place egg whites in a container and cover with plastic wrap. Leave at room temperature for 12-24 hours. 
  2. COOKIES: Add a drop of food coloring at a time to the granulated sugar and whisk together until evenly colored (the sugar will be darker than the final macaron). Set aside and let dry (a few minutes).
  3. In the meantime, grind the almond meal and powdered sugar in a food processor until thoroughly mixed. 
  4. Whip egg whites until foamy, slowly add the granulated sugar and continue to whip until they reach soft peaks and are glossy. Don’t overbeat the whites (some recipes say to beat to stiff peaks but I think that it would be better to beat to soft-medium peaks).
  5. Carefully, fold the almond and powdered sugar mixture into the whites with a wide spatula. The mixture should remain shiny and flow easily. 
  6. Fill a pastry bag, fitted with a plain round tip (I think mine is about 3/4-in in diameter) with the batter and pipe small rounds baking sheets lined with silpats or parchment paper. Let the macarons rest for 1 hour. 
  7. Preheat the oven to 315°F and bake for 13-15 minutes.
  8. Let cool completely on baking sheet/silpat then remove from the paper.
  9. Match up by size and fill with your choice of filling.

Thursday, September 30, 2010

Taking a Break from Baking - Green Chile Pork Stew

Green Chile Pork Stew with All the Sides

I saw that New Mexico green chiles were going to be coming to Berkeley Bowl as a special. Apparently, New Mexico is famous for these green chiles and it is hard to find them outside of New Mexico except for this time a year when some stores have them shipped in. I decided that I wanted to make something with these chiles even though I had never used them before. After doing some research I decided on Green Chile Pork Stew. I found that there are few variations including New Mexico as well as Mexican versions. I chose the New Mexican style because they were New Mexico chiles. The main difference I found in the recipes was the inclusion of tomatillos in most Mexican variations of green chile stew/chile verde.

Here is the recipe I came up with. I combined a couple of recipes' ingredients and procedures and this was the result:

New Mexico Green Chile Pork Stew

Ingredients:
18 New Mexico green chile peppers (I used 8 Anaheim, 5 Big Jim, and 5 Sandia peppers) 
3 jalapenos 
2 tbs vegetable oil 
2 1/2 lbs boneless pork shoulder or butt, cut into 1 inch cubes 
salt 
1 medium onion, chopped 
5 cloves garlic 
1 tbs minced, seeded jalapeno 
1 tsp oregano 
1 1/2 tsp salt 
1 tsp ground cumin 
2 tbs all-purpose flour 
3 cups low sodium chicken stock 
Directions: 
  1. Roast the peppers by placing them on a baking sheet and putting them under the broiler. Turn them frequently to get an even char all over the peppers. Alternately, roast on an open gas flame, turning them frequently with tongs until all sides are charred black, about 7 to 10 minutes (you can also roast peppers on an outside grill).
  2. Place the blackened peppers in a large bowl or plastic bag (s), and let rest until cool enough to handle, about 15 minutes. This will loosen the skins.
  3. Peel the skin off the peppers, and remove most of the seeds and the stems. Chop the peppers and set aside.
  4. In a dutch oven or large pot, heat the oil over medium-high heat.
  5. Lightly season the cubes of pork with salt and, in batches, add them to the pot, cooking until browned, about 8-10 minutes. Once browned, remove pork from the pot and set aside. If there is a lot of fat left in the pot, pour off excess and leave about1/4 cup.
  6. Lower the heat slightly, and add the onions, garlic and jalapenos to the pot and cook, stirring, until tender, about 3 minutes.
  7. Add the oregano, salt, and cumin, and cook, stirring, for 1 minute.
  8. Add the flour and cook, stirring, without allowing to color, for 2 minutes.
  9. Add the reserved, chopped peppers, and stir well to combine. Add the chicken stock, stir well, and bring to a boil. Lower the heat to medium-low and simmer, stirring occasionally, for 45 to 60 minutes or until the pork is tender.
*We made cilantro-lime rice to eat with the Green Chile Pork Stew. Cook white rice as directed and mix in handful of chopped cilantro, juice of 1-2 limes and salt to taste.

Store bought tortillas, homemade guacamole and canned refried beans rounded out the meal.


Wednesday, September 29, 2010

Nothing Beats Homemade - Mint Milanos

Homemade Mint Milanos

I love Pepperidge Farms Mint Milanos. I used to buy them whenever I saw them on sale at the grocery store, but haven't bought them for awhile now. I saw this recipe and I knew that I wanted to make them. The original recipe is for orange-chocolate filled Milanos so I substituted peppermint extract in the filling. 

It was difficult to get the correct size of the cookies. The recipe said to make them 1 inch long and that resulted in very small, bite-size cookies....not exactly what I was looking for.  When Ryan and I were making them we experimented with different lengths and widths. If you are going to make these I would make them about 2 inches long. They spread out, but I would try to get the cookies to be about 1/2 - 3/4 inch wide before baking. Next time I will try using a bigger piping tip. Lastly, because we made them larger than the original recipe 10 minutes was not long enough and the cookies came out too soft and pliable. Next time I will make sure they get a darker golden brown.

Here is the recipe with my changes:

Homemade Mint Milanos
adapted from Gale Gand's Milan Cookies

Ingredients:
12 tbs (1 1/2 sticks) butter, softened
2 1/2 cups powdered sugar
7/8 cup egg whites (from about 6 eggs)
2 tbs vanilla extract
1 1/2 cups flour
Cookie filling, recipe follows
Directions:
  1. Preheat oven to 350 degrees. Place silpats on baking sheets and set aside (I tried one baking sheet with parchment paper and my cookies came out very mishapen).
  2. Using a stand mixer with paddle attachment or hand mixer fitted to cream the butter. Add powdered sugar and mix until combined and fluffy.
  3. Gradually add the egg whites and mix in the vanilla extract.
  4. Slowly add the flour and mix until just incorporated. 
  5. Fill a piping bag with a small (1/4-inch) plain tip, pipe 2 inch sections of batter onto a parchment-lined sheet pan, spacing them 2 inches apart as they spread. Bake for 10-14 minutes or until golden brown around the edges. Let cool on the pan.
  6. When cookies are cool, match cookies up by size. Spread filling on one cookie and sandwich together with the other. Repeat with the rest of the cookies.
Cookie Filling:
1/2 cup heavy cream
8 ounces semisweet chocolate chips
1 tsp peppermint extract
Directions: 
  1. Pour heavy cream into a small saucepan and heat, but do not boil.
  2. Pour hot cream over chocolate in a bowl. Let sit for a couple minutes.
  3. Whisk to melt chocolate, add peppermint extract and blend well. Set aside to cool (put in the fridge to speed this up).

Monday, September 27, 2010

Just About Perfect!

Chocolate Chip Cookies

I think everyone has their favorite type of chocolate chip cookie - thick and chewy, thin and crispy and everything in between. I've been searching for my perfect chocolate chip cookie recipe - super thin, crispy around the edges and chewy in the middle. I had made cookies that fit this description before, but I couldn't find the recipe I used. So my previous post about chocolate chip cookies was not the right recipe so I continued to search. This recipe looked like it could be it...and IT WAS! I had to tweak it slightly because the first few sheets I baked came out very thin and inedible. So I added a little bit of flour and put the dough in the fridge to harden a bit. I also added a few more chocolate chips because it made a giant batch of cookies and I didn't think there was enough in the original recipe.

Next time I use this recipe I think I will either reduce the butter (there is A LOT) or add some flour to the dough. Hopefully, this will result in the perfect chocolate chip cookie. The original recipe comes from Martha Stewart's daughter Alexis. Here's the recipe I would use next time:

Perfect Chocolate Chip Cookies

Ingredients:
3 1/2 cups flour
1 1/2 tsp salt
2 tsp baking soda
3 1/2 sticks unsalted butter, room temp
3 cups packed brown sugar
1 cup sugar
4 large eggs
2 tsp pure vanilla extract
1 3/4 cups semisweet chocolate chips

Directions:
  1. Preheat oven to 375 degrees. Line two baking sheets with parchment paper, and set aside. 
  2. In a large bowl, sift together the flour, salt, and baking soda; set aside. In the bowl of a stand mixer (or handheld mixer) use the paddle attachment to beat the butter on medium speed until smooth. 
  3. Add both sugars, and beat until combined and fluffy. 
  4. Beat in the eggs one at a time and add vanilla and mix until well blended.
  5. Slowly add flour mixture, and beat on low speed until combined. 
  6. Add the chocolate chips, and mixuntil combined.
  7. Drop 2 tablespoons of batter at a time onto baking sheets, about 2 inches apart. These cookies spread A LOT (I only put 6 cookies per sheet).
  8. Bake until golden brown, about 8 minutes, rotating halfway through. Remove the cookies and the parchment paper from the baking sheets, and let cool on a rack.
* If the first cookie sheet of cookies spreads to much mix in a few tablespoons of flour into the remaining dough. Adjust as necessary. I think that the butter temperature as well as outside temp changes the outcome of the cookies drastically. I think its necessary to adapt as needed.

Tuesday, September 21, 2010

Macarons vs. Macaroons

So I was researching macarons today and I learned something new =) The main reason people get "macaron" and "macaroon" confused is because they can be used to describe the same cookie. Macaron is the French spelling and macaroon is the English spelling of similar meringue almond cookies. Because the English spelling, macaroon, can also mean the coconut ball cookie, the French spelling, macaron, has been adopted by many. Apparently, macarons are a type of macaroons. But macaroons (the coconut cookie) are not macarons. So either macaron or macaroon is technically correct when describing the meringue almond cookies.

Still very confusing.

Thursday, September 16, 2010

Baking Trends - Macarons

Chocolate Macarons with Espresso Ganache

It seems like colorful macarons are a big trend right now. Shops sell beautifully colored cookies stacked up in pretty boxes. Note: these are macarOns not macarOOns (the coconut cookies)...people seem to get the names confused calling both macaroons.

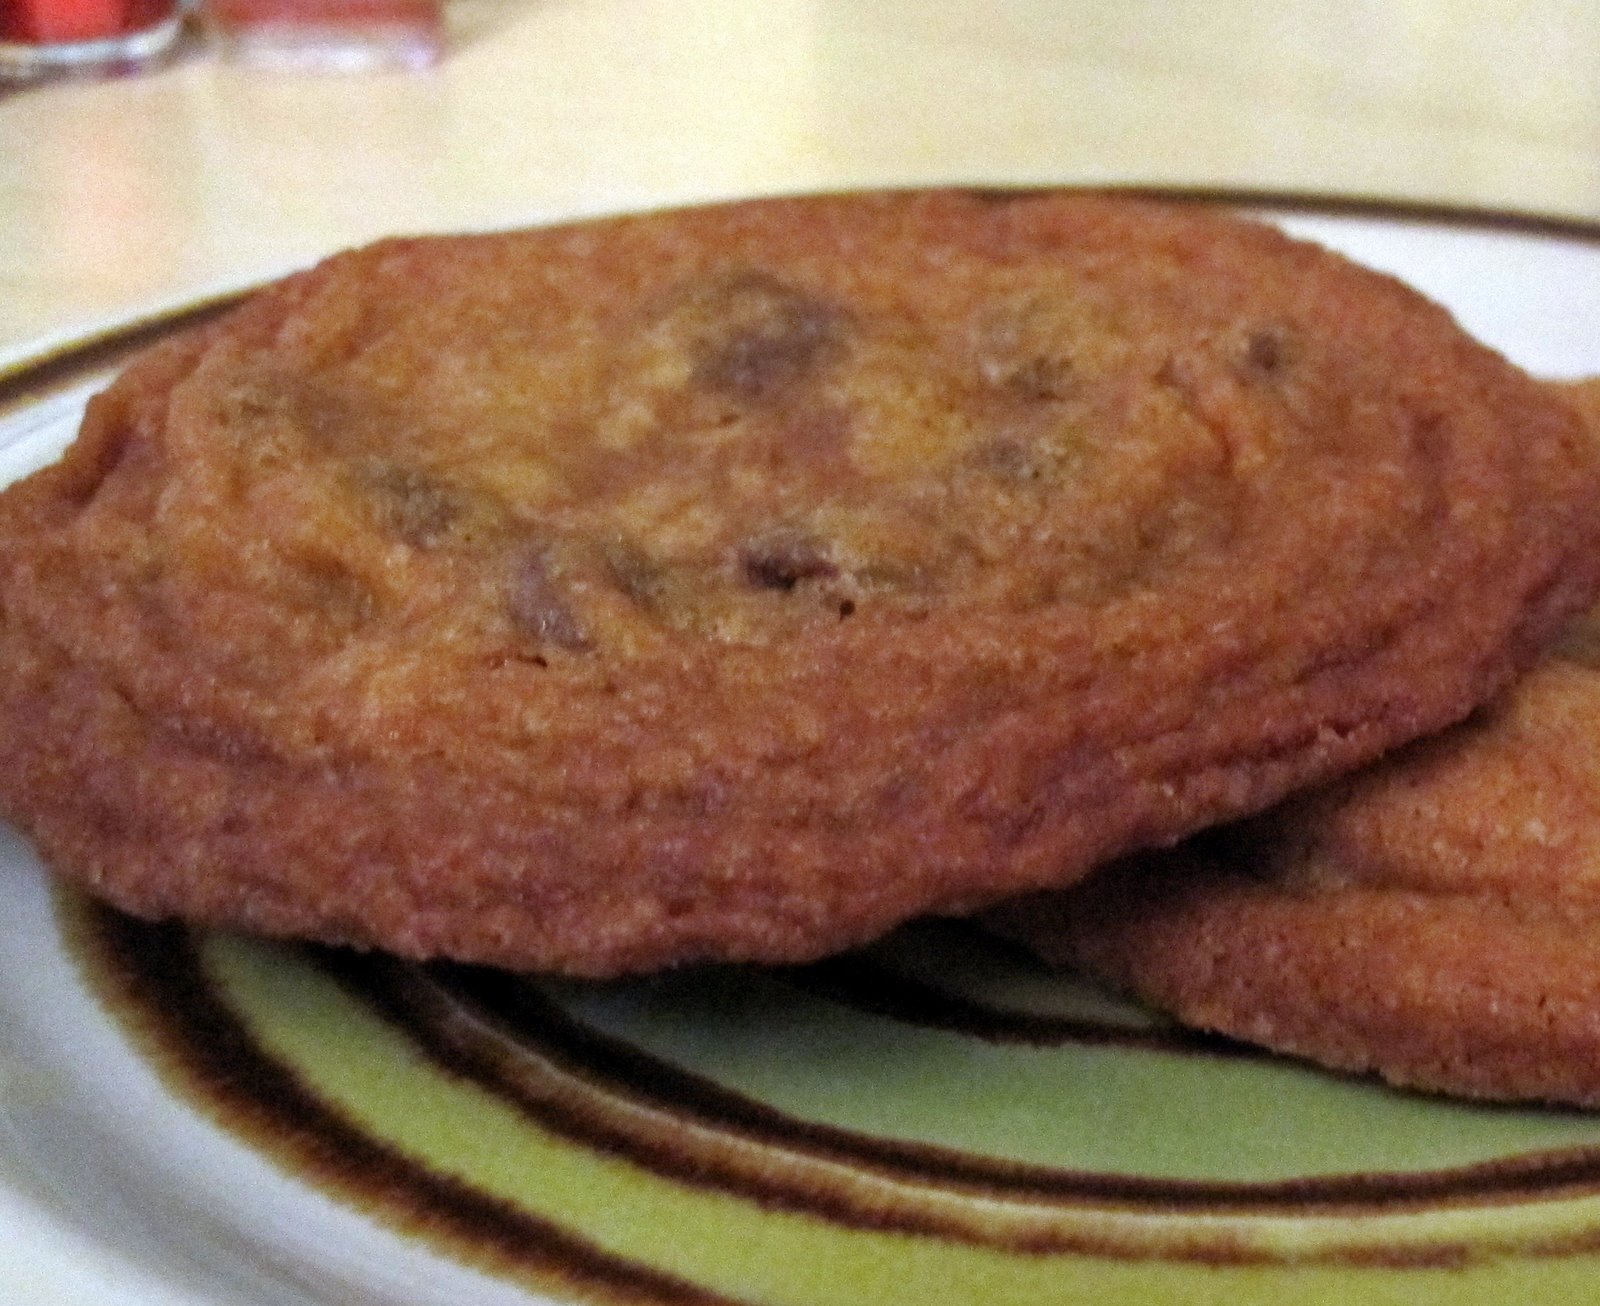
Before baking this recipe I had never had a macaron let alone baked them. It takes a while to make macarons (you have to let them sit for an hour on the baking sheet before going into the oven) but the process isn't that difficult. It is important to pay attention to all the instructions because the cookies are very sensitive. This meant using a scale to weigh out the ingredients instead of just using measuring cups. This ensures that you get the exact right amount of each ingredient. Another weird aspect of making macarons is that you need to "age" your egg whites. This kind of grossed me out, but after you separate the eggs you let the whites sit at room temperature anywhere from 12 to 48 hours. I let mine sit about 16-18 hours. Apparently, this helps the egg whites become more liquidy, yet they will still be safe to eat. Lastly, I used parchment paper to baking my cookies on, but I think I need to invest in silicone baking mats because a lot of my cookies stuck to the parchment and I lost a lot of cookies =(

Chocolate Macarons

Ingredients:
110 gm blanched slivered almonds
200 gm minus 2 tbs confectioners’ sugar
2 tbs cocoa powder
100 gm egg whites (about 4 eggs), aged at room temperature for 12-24 hours
50 gm granulated sugar
Espresso Ganache (see below)
Directions:
  1. Put the almonds in the bowl of a food processor and pulse until finely ground. Add the confectioners' sugar and cocoa powder and process until well blended. 
  2. In a large bowl use a hand mixer with whisk attachments (you could use a stand mixer), beat the egg whites until they are foamy. Slowly add the granulated sugar and continue beating until stiff peaks form. The egg whites should be smooth and shiny.
  3. Add the ground almond mixture to the bowl with the meringue and using a rubber spatula, gently fold mixture until there are no streaks. The mixture should be thick, but should be able to fall in ribbons off your spatula.
  4. Line two baking sheets with silicone baking mats (or parchment paper). Transfer the batter to a piping bag fitted with a plain wide round tip (I used a #12 tip). Pipe into small rounds onto the baking sheets (1 or 1 1/4 inches in diameter) leaving about 1 inch inbetween. 
  5. Let cookies sit at room temperature for about an hour to develop a hard shell.
  6. Preheat the oven to 300˚F. Bake for 9-11 minutes, depending on size. Transfer the pans to a wire cooling rack and let cool completely before moving the cookies.
  7. Match all the cookies into pairs of equal size. Pipe a layer of ganache onto the flat side of one cookie of each pair. Carefully, sandwich the two cookies together. Continue with the rest of the cookie pairs. Store in an airtight container (can be stored in the fridge for about a week).

Espresso Ganache
Ingredients:
1/2 cup heavy cream
1 tbs unsalted butter
1 tbs granulated sugar
  1/3 cup bittersweet chocolate, finely chopped
  3 tsp espresso powder

Directions:
  1. Place the chopped chocolate in a small heatproof bowl.
  2. Combine the cream, butter and sugar in a small saucepan over medium heat. Bring to simmer and pour over the chocolate. 
  3. Let stand 2 minutes, then whisk gently until chocolate is melted and mixed in. 
  4. Add espresso powder and mix until combined. 
  5. Let the mixture cool (place in refrigerator to speed cooling) until it is thick enough to pipe.

Quick and Easy Cookies - Snickerdoodles


Cookies!

Snickerdoodles are a quick and easy cookie. I used to make them when I was little. It was always fun to roll the little balls of dough around in the cinnamon-sugar mixture. This recipe is from a cookie recipe book called Cookies Galore. The cookies came out pretty tasty, but I think I prefer mine a little flatter and thinner (I think this is my preference in general for cookies...). I used a tablespoon to measure out the cookies and I think I needed more sugar and cinnamon for the coating.

Snickerdoodles
from Cookies Galore by Jacqueline Bellefontaine

Ingredients:
3/4 cup butter, softened
1 cup granulated sugar
1 egg
1 tsp vanilla extract
2 scant cups flour
1 tsp cream of tartar
1/2 tsp baking soda
Coating:
1 tbs sugar
1 tsp ground cinnamon
Directions:
  1. Preheat oven to 400 degrees. Lightly grease two baking sheets.
  2. Cream the butter and sugar together until light and fluffy. Beat in the egg and vanilla. Sift the flour, cream of tarta, and baking soda together and blend into butter mixture to form a soft dough.
  3. Break off pieces of the dough about the size of a small walnut and roll into balls. Mix the 1 tablespoon of sugar and cinnamon together and roll each ball in the cinnamon sugar. Arrange on baking sheets, allowing room for the cookies to spread.
  4. Baking until pale golden, about 8-10 minutes. Transfer to wire rack to cool.

Thursday, July 15, 2010

The Search for the Perfect Chocolate Chip Cookie


Not So Perfect Chocolate Chip Cookies

Last summer I made chocolate chip cookies for a going away potluck. They were the best chocolate chip cookies ever! Very thin and crisp around the edges, but soft and chewy in the middle. I wanted to make the cookies again, for the 4th of July, but I couldn't find the recipe! I thought I had used a Martha Stewart recipe so I looked at her website and thought this recipe might be it. Unfortunately, it was not. The cookies didn't spread nearly enough and therefore were much thicker than the cookie I wanted.

There is one more recipe on Martha's website that I'm really, really hoping is the right one. For now, here is the recipe for these chocolate chip cookies...which were good but just not the perfect chocolate chip cookies.


Wednesday, June 23, 2010

I Couldn't Even Take a Picture Before They Were Gone!

For Karen's birthday bonfire celebration I decided to make Nutella Sandwich Cookies. Everyone I know loves Nutella and these cookies were really yummy! I didn't get a chance to take a picture before the bonfire, which turned out to be a big mistake because they were all gone before I could snap a picture! So, I have the recipe and I will just have to make them again soon....I don't think anyone will mind =)

Mine turned out pretty similar to the original recipe so to see a picture visit Living Eventfully.

Nutella Sandwich Cookie

Ingredients:
1 3/4 cup all-purpose flour
1 tsp baking soda
3/4 tsp salt (I might reduce this to 1/2 tsp)
1/2 cup butter, softened
2/3 cup Nutella
1/2 cup sugar
1/2 cup packed light brown sugar
1 large egg
2 tsp pure vanilla extract
Sugar for rolling cookies in
Nutella-Chocolate Ganache (see below)
Directions:
  1. Preheat the oven to 375 degrees F.
  2. In a medium bowl, whisk together flour, baking soda, and salt. Set aside.
  3. In your stand mixer bowl place the butter, Nutella and both sugars. On medium low speed, cream together mixture for about 3 minutes.
  4. Add the egg and vanilla and blend until combined.
  5. Mix in the dry ingredients until just incorporated.
  6. Chill dough in refrigerator for 30 minutes.
  7. Shape the cookie dough into 1 inch, about 1 teaspoon sized round balls.
  8. Rolls the cookie balls in sugar and place the cookies on a heavy cookie sheet about 2 inches apart.
  9. Place in oven and bake for 6 minutes.
  10. Remove from oven and allow to cool on cookie sheet for about 5 minutes.
  11. Transfer to a cooling rack to cool completely.
  12. Spoon a small amount of the ganache on to the bottom of one cookie.
  13. Top off with another cookie and allow to set.


Nutella-Chocolate Ganache

Ingredients:
1/3 cup heavy cream
3/4 cup semi-sweet chocolate chips
1/4 cup Nutella
Directions:
  1. In a medium saucepan, heat heavy cream.
  2. Put chocolate chips into a medium sized bowl.
  3. Remove cream from heat and pour over chocolate chips.
  4. Allow to stand for 2 minutes then whisk until smooth.
  5. Add in Nutella and mix to combine.

Sunday, June 13, 2010

Happy (Belated) Birthday, Ryan

Buttermilk Cupcake with Strawberry Mousse and Swiss Meringue Buttercream

So I made cupcakes for Ryan's birthday, but they didn't come out well so I'm not going to post the recipe. The strawberry mousse was yummy and so was the frosting...which is basically Martha Stewart's Swiss Meringue Buttercream with a little less sugar. I was very sad they didn't come out well, but hopefully I will try a new cupcake recipe soon.


Sunday, May 16, 2010

Alfajores = Dulce de leche Cookies


Alfajores with Margaritas and Chips

A few weeks ago we had a taco potluck. I brought homemade Mexican rice along with these cookies. Alfajores are basically a cornstarch shortbread cookie filled with sweet dulce de leche.  Making homemade dulce de leche seems easy, but I had to try it twice before filling the cookies. The filling was thinner then I would have liked, but the first batch wasn't even spreadable.

Along with the variety of taco fillings, sides, churros and these cookies we had a yummy and successful taco party. Yum.

Alfajores aka Dulce de leche Cookies

Ingredients:
2 sticks butter, room temp
1/2 cup sugar
1 egg plus one yolk
1 tsp vanilla
2 cups flour
1 cup cornstarch
1 tsp baking powder
1-2 cups dulce de leche, see recipe below
powdered sugar

Directions:
  1. In the bowl of a stand mixer, cream the butter and the sugar. Add in the egg, egg yolk and vanilla and beat until incorporated. 
  2. In a separate bowl, combine the flour, cornstarch and baking powder. A little at a time, add the flour mixture to the butter mixture and continue mixing until it forms a dough.
  3. Remove the dough from the mixer and divide the dough into two balls. Wrap the balls in plastic wrap and refrigerate overnight.
  4. Preheat the oven to 350 degrees. Unwrap one ball of dough and roll it out on a floured surface. Roll the dough out to about 1/4 inch thickness, then cut with a small round cutter (or a juice glass). Repeat the rolling and cutting until you have used all the dough. Repeat with other ball of dough.
  5. Place the cookies on a greased cookie sheet, and bake for 15 minutes or until the edges start to brown. Cool cookies completely. 
  6. Spread a generous dollop of dulce de leche on one cookie and top with another cookie to make a sandwich. Press gently together. Cover in sifted powdered sugar.
Dulce de leche

Ingredients:
1-14 oz can of sweetened condensed milk
Directions:
  1. Fill a medium sauce pan with about an inch of water. Place a metal bowl on top, making sure the water does not touch the bottom of the bowl.  Bring the water to a boil, then reduce to a simmer.
  2. Pour a 14 oz can of sweetened condensed milk in the bowl and set it over the simmering water. 
  3. Every 45 minutes, stir the milk.  Check the water level and replenish the simmering water with hot water as needed. 
  4. When the milk is as thick as pudding and is a rich, dark caramel color, 2 1/2 to 3 hours, remove from heat, cool thoroughly, cover with plastic wrap, and use immediately or refrigerate for later use.

    Wednesday, April 21, 2010

    YUM

    SO GOOD!

    I just bought Nutella and strawberries at Costco and I wanted something sweet. This is the easiest, but tastiest sweet treat. It's silly to even put a recipe. Just slice and toast baguette, spread with Nutella, top with sliced strawberries and ENJOY!

    Lemon Bars

    Stack of Lemon Bars

    I hadn't baked anything awhile and I wanted something quick and easy to make. These lemon bars were just that. I made the crust and while it was baking I made the filling by hand, with just a whisk. It goes back into the oven for a little bit and then they need to cool. I found that they tasted a lot better after they had cooled for awhile in the fridge rather than room temperature/from the oven. These didn't come out super lemon-y, but pretty tasty nonetheless.

    Here's the recipe...my changes were more lemon juice and I let them cool in the fridge before cutting and dusting with powdered sugar.

    Lemon Bars
    from the Taste of Home Baking Book

    Ingredients:
    1 cup flour
    1/2 cup butter, softened
    1/4 cup confectioners' sugar
    2 eggs
    1 cup sugar
    2 tbs flour
    1/2 tsp baking powder
    2 tbs lemon juice (I think I used closer to 3 tbs)
    1 tsp grated lemon peel
    Confectioners' sugar to garnish
    Directions:
    1. In a bowl, combine the flour, butter and confectioners' sugar. Pat into an ungreased 8-in square baking dish. Bake at 350 for 20 minutes.
    2. For filling, in a small mixing bowl, beat eggs. Add the sugar, flour, baking powder, lemon juice and peel; beat until frothy. Pour over the crust. Bake 25 minutes longer or until light golden brown. Cool on a wire rack. Dust with confectioners' sugar. Cut into bars.

    Monday, April 5, 2010

    Lemon Poppy Seed Bread

    Poppy Seed Bread in the Sunshine

    Inspired by the giant Costco poppy seed muffins I made a loaf of lemon poppy seed bread! This bread version was a lot more lemon-y than the muffins, but still very tasty. The batter came together quickly and then baked for about an hour. After it was done baking I poured a lemon-sugar syrup over the bread and after it was cooled I wrapped it in plastic wrap. Then it sat overnight so the syrup could soak in.

    Lemon Poppy Seed Bread
    adapted from Joy of Baking

    Ingredients:
    3 large eggs
    1 1/2 tsp pure vanilla extract
    1/4 cup milk
    1 1/2 cups all-purpose flour
    3/4 cup sugar
    1 tsp baking powder
    1/4 tsp salt
    1 tbsp grated lemon zest
    3 tbsp poppy seeds
    12 tbsp unsalted butter, softened

    Directions:
    1. Preheat oven to 350 F and place the oven rack in the center of the oven. Spray a loaf pan with non-stick spray and set aside.
    2. In a bowl, whisk together eggs, vanilla extract, and milk.
    3. In the bowl of your electric mixer mix the flour, sugar, baking powder, salt, lemon zest and poppy seeds until combined.
    4. Add the softened butter and half of the egg mixture and mix on low speed until moist. Increase the speed to medium and beat for one minute.
    5. Scrape down the sides of the bowl and add the remaining egg mixture and mix for 30 seconds.
    6. Pour the batter into the pan.
    7. Bake for 55 to 60 minutes, or until the bread is golden brown and a toothpick comes out clean. If the top of the bread is getting too brown during baking, cover with aluminum foil.
    8. When bread is done, remove and cool on a wire rack. Poke holes in the top of the hot loaf and brush or spoon half of the lemon syrup over the top. Cool the bread for 5 minutes and then turn it out upside down. Brush/spoon the rest of the syrup over the bottom and sides of the bread. Set bread upright and let cool completely. Wrap in plastic wrap and let the bread sit overnight before slicing.

    Lemon Syrup

    Ingredients:
    1/4 cup fresh lemon juice
    1/3 cup granulated white sugar

    Directions:
    1. In a small saucepan, bring the sugar and lemon juice to a boil and stir until all the sugar dissolves.

    Wednesday, February 24, 2010

    Girl Scout Cookies...Made at Home!

    Samoas Cookie Bars


    Usually, when I eat Girl Scout cookies I choose Thin Mints. I actually never really liked Samoas, but these Samoas Cookie Bars looked like they would be fun to make and eat. The end result was really yummy! I wish I could have used better quality caramels for the topping, but there was only one type at the store so I didn't have a choice. 

    The bar is a shortbread crust that is baked and cooled. Then you melt the caramel and mix it with toasted shredded coconut and spread the mixture over the top. After the bars have cooled completely the bars and dipped and drizzled with melted chocolate. I cut the bars into small squares to more resemble the size of cookies rather than normal bars such as brownies. The result is a rich cookie with a great chewy texture. Yum.

    Get the recipe here.

    Thursday, January 28, 2010

    My First Ice Cream!

    Yum.
    (Picture Courtesty of Ryan Mak)

    I got an ice cream attachment for my Kitchen Aid mixer. I've had it since Christmas so even though its still Winter it was definitely time to use it. Ryan and I made Stracciatella ice cream...basically vanillia with bits of chocolate running through it.  Once again, I used a vanilla bean (from Whole Foods). I've really liked using the vanilla beans. They make everything taste very vanilla-y and make your hands smell good when you are baking with them. The recipe was pretty easy to make...the hard part was waiting for it to cool before putting it in the ice cream maker and then also waiting for it to harden in the freezer. Not easy to do! Here is the recipe...

    Stracciatella Ice Cream
    adapted from David Lebovitz

    Ingredients:
    1 cup whole milk
    3/4 cup sugar
    2 cups heavy cream, divided
    1 vanilla bean, halved lengthwise
    6 large egg yolks
    3/4 tsp pure vanilla extract
    4 oz bittersweet chocolate, chopped
    Directions:
    1. Combine milk, sugar, and 1 cup cream in a heavy saucepan. With tip of a knife, scrape seeds from vanilla bean into mixture, then add vanilla bean to pot as well. Bring mixture just to a boil, whisking until sugar has dissolved, then remove from heat. Cover and let stand 30 minutes.
    2. Reheat cream mixture over medium heat, stirring, until hot. 
    3. Whisk yolks in a medium bowl, then add half of hot cream mixture in a slow stream, whisking constantly, then pour yolk mixture into remaining cream mixture in saucepan, whisking. 
    4. Cook custard over medium-low heat, stirring constantly with a wooden spoon, until custard is thick enough to coat back of spoon and registers 170 to 175°F on an instant-read thermometer (do not let boil).
      Strain custard through a fine-mesh sieve into a metal bowl. 
    5. Stir in vanilla and remaining cup cream, then return vanilla pod to mixture. Chill, uncovered, until cool, then chill, covered, at least 6 hours. 
    6. Remove vanilla pod and freeze custard in ice cream maker according to manufacturer's instructions.
      While ice cream is freezing, melt chocolate in clean metal bowl set over a saucepan of barely simmering water, stirring frequently, then transfer to a small ziploc bag. 
    7. When ice cream has finished churning, carefully cut a small hole in the corner of the bag and drizzle chocolate in a slow stream directly onto ice cream as it churns and continue to churn 30 seconds (chocolate will harden in steaks). 
    8. Transfer ice cream to an airtight container and put in freezer until firm, at least 4 hours or overnight.

    Monday, January 25, 2010

    My FAVORITE Dessert


     Firing the Creme Brulee!
    (Picture Courtesy of Ryan Mak)

    I love creme brulee. It is definitely my favorite dessert. I've always wanted to make it so when I got a big torch and ramekins for my birthday/Christmas I was all set. Making creme brulee is pretty easy, but I definitely think that fresh vanilla bean is the key to a great dessert. Ryan and I found them at Whole Foods. It looks like they will be really pricey at $150/lb, but we bought 3 beans for $3. We used Alton Brown's recipe, with the only change being that we didn't make/use vanilla sugar. Here is the recipe. YUM.

    Creme Brulee
    adapated from Alton Brown

    Ingredients:
    1 quart heavy whipping cream
    1 vanilla bean, split and scraped
    1/2 cup sugar, plus more for sprinkling
    6 large egg yolks
    Hot water, as needed
    Directions:
    1. Preheat the oven to 325 degrees F.
    2. Place the cream, vanilla bean and its pulp into a medium saucepan set over medium-high heat and bring just to a boil. Remove from the heat, cover and allow to sit for 15 minutes. 
    3. Remove the vanilla bean and throw out vanilla bean or reserve for another use. 
    4. In a medium bowl, whisk together 1/2 cup sugar and the egg yolks until well blended and it just starts to lighten in color. Add the cream a little at a time, stirring continually. 
    5. Pour the mixture into 6-8 (6 to 8-ounce) ramekins. Basically, fill up to the little line on the inside of the ramekin.
    6. Place the ramekins into a large cake pan or roasting pan. Pour enough hot water into the pan to come halfway up the sides of the ramekins. 
    7. Bake just until the creme brulee is set, but still trembling in the center, approximately 40 to 45 minutes. Remove the ramekins from the roasting pan and refrigerate for at least 2 hours and up to 3 days.
    8. Remove the creme brulee from the refrigerator for at least 30 minutes prior to browning the sugar on top. Sprinkle sugar and spread evenly over the top of the custard. 
    9. Using a torch, evenly melt the sugar until it forms a crispy top.
    10. Allow the creme brulee to sit for at least 5 minutes before serving.


    Monday, January 4, 2010

    Celebrating the New Year

    Lemon Mousse with Blackberries and Raspberries
    (Picture Courtesy of Ryan Mak)


    Here is the recipe for the Lemon Mousse I made for New Year's Eve. The recipe was pretty simple. First you make a lemon curd from eggs, sugar and lemon juice. Then you just have to whip up some cream and fold them together. This dessert was very light and lemony. I topped the mousse off with fresh berries, but since the berries aren't really in season I think it was better without them.


    The recipe can be found on Pastry Pal's website. I followed the recipe exactly except for the fact that I doubled both the lemon curd and mousse. To serve, I spooned the mousse into fancy, little plastic cups and topped with a few berries.


    Caramel Popcorn

    To celebrate the New Year I made Caramel Popcorn (and Lemon Mousse - to be posted soon) for a pizza party potluck. It was easy enough to make but I didn't read the recipe carefully before starting and didn't realize it needed to go into the oven for 40-50 minutes. Mine probably baked for maybe 35 minutes, but it didn't seem to make a significant difference in the result. That result? Deliciously sweet caramel popcorn. Here is the recipe:

    Ingredients:
    1 cup popcorn unpopped
    1 cup butter
    1/2 cup corn syrup
    2 cups brown sugar
    1 tsp kosher salt
    1/2 tsp baking soda
    1 tsp vanilla
    Directions:
    1. Preheat oven to 250F.
    2. Pop popcorn and place popped corn in a very large bowl or multiple bowls. You need enough room to be able to mix the popcorn with the caramel later.
    3. In a large saucepan, over medium heat, gently melt the butter
    4. Stir in the corn syrup, brown sugar and salt.
    5. Increase the heat to medium-high and bring the sugar mixture to a boil, stirring constantly.
    6. Once it reaches a boil, boil for 5 minutes without stirring.
    7. Remove from the heat, stir in the baking soda and vanilla.
    8. Pour the caramel sauce over the popcorn and toss to coat thoroughly.
    9. Spread the popcorn evenly onto 2 large cookie or baking sheets. Bake for 40 to 50 minutes, stirring every 10 minutes or so.
    10. Remove popcorn from the oven and allow to cool.
    11. Serve immediately or store in airtight container.